 |
| Bottom panel glued in place. I used a dremel to cut the oval recess in front of the hatch into the balsa planking. |
 |
| I detailed the large hatch and glued it into its place with contact glue. |
 |
| Micro screws added. Looks okay to me. |
|
| Bottom panel glued in place. I used a dremel to cut the oval recess in front of the hatch into the balsa planking. |
|
| I detailed the large hatch and glued it into its place with contact glue. |
|
| Micro screws added. Looks okay to me. |
 |
| Dry fitting of the panel. Note the cut outs for the tank and tank vents. |
 |
| The tank hatch was cut and a paper template was made for the rivet pattern. |
 |
| Dry fitting the hatch. Fit is good! |
 |
| The panel glued in place after riveting and shaping. |
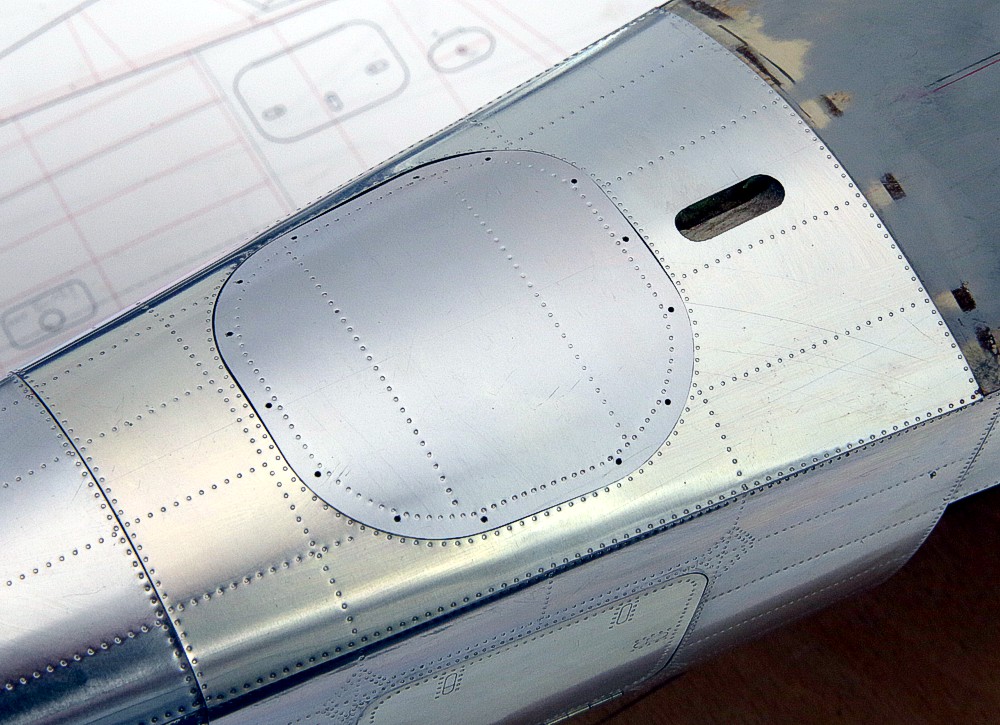 |
| The hatch will get more detail by adding the slotted screws later on. |
 |
| I built a stand/jig for the fuselage from ply wood and MDF. |
 |
| The fuselage in the jig. |
 |
| First panel on the bottom. |
 |
| Panel #4 finally fits the gap. |
 |
| More lithoplating in progress. |
 |
| The fuel tank hatch drawn onto the panel. |
 |
| Fuel tank hatch cut out. MDF backing for a better sawing and filing of the thin sheet metal. |
 |
| Nice cut out, a little fine tuning is still necessary. |
 |
| Dry fitting of the large hatch. |
 |
| Embossed and engraved rivets and fasterner detail. The hinge is made of telescoping tubing from Albion Alloys. |
 |
| Styrene template for the large panel on the right side of the fuselage. Frames and longerons marked with a pencil. |
 |
| Finished panel glued in place. Plating of the fuel tank chamber started. |
 |
| Dry fitting of the Floor plating and fuel tank plating. |
 |
| Circular opening for the external energy socket. Oval opening for the oxygen filler port. |
 |
| Plating with rivet detail glued into place. |
 |
| Left side plating of the fuel tank chamber. |
 |
| Marking the frame positions on the paling. |
 |
| I made a paper template to determine the rivet pattern. |
 |
| Detail shot of the template. |
 |
| After embossing the rivets and flatening the panel: a first dry fit of the new panel! |
 |
| I masked off the hatch to avoid glue stains in that area. |
 |
| Panel glued in place :-) |
 |
| The mid fuse section takes shape :-) |
 |
| Starboard panel glued in place with contact cement. |
 |
| Pott panel glued in place, too. |
 |
| I cut a template from sheet styrene for the front panel with the prominent, large hatch. |
 |
| The outline of the template were transfered to lithoplate. The hatch was then cut with a saw and then file to exact dimensions using echappement file. While cutting I backed the sheet metal with a MDF plate to stabilize it while handling. |
 |
| Side panels: First I make a template from .13 mm sheet styrene. |
 |
| I transfered the template to lithoplate and cut it to shape. |
 |
| I added a paper template for the rivet pattern around the jackup pipe. Also added the frames and stringers with a pencil. |
 |
| Right side of center fuselage: I added the front panel (took 3 attemps :-( ). I use tape for defining the shape and rivet lines for the rear panel. |
 |
| I transferred the info from the tape onto lithoplate. It was then cut to shape and the rivets were embossed. |
 |
| The rear panel glued in place. Needs some clean up ... |
 |
| Right shell of the extension glued in place. |
 |
| Hatch in the extension. Some details are still missing. |
 |
| Rear deck. I added a center slot for the sliding canopy. |
 |
| I added the riveting, some details still missing. |
 |
| Frame 8 was also plated, the floor is still unplated. |
 |
| The bending was done in 3 steps: 1. On a thin rubber matt. 2. On a folded cotton tissue 3. On a piece of soft foam. |
 |
| I tried to make a close fit so glueing is less stressful. |
 |
| I added the rivet pattern using the template and a stone bedding tool, DIA 0.45 mm. |
 |
| Glueing brought a problem. The grey primer was dissolved by the solvents of the contact glue and that made it difficult, more difficult than necessary! Lessen learned: sand off grey primer prior to glueing! |
 |
| I got a rivet template from Peter/Airscale for free! THANK YOU PETER! :-) |
 |
| I am happy with the outcome of the lithoplating so far. The extension plug has no compund curves ;-) |
