Impressions of finished model and diorama


 |
| Dry fitting the cockpit tub into the fuselage. Interior was upgrade with Eduard PE set #32893. Cockpit detail is soft and restricted, so PE is a good way to upgrade the front and back office! |
 |
| Eduard´s PE parts came out quite nicely. I used RAL 7024 for RLM 66 from Zeropaints. |
 |
| Leather seat backrest was done with fast drying Griffin Alkyd oils from Winsor & Newton. |
 |
| Kit quality is a bit ambivalent: with careful cleaning fit can be good. But the nose panels fit horribly. Surface details are finely engraved and airframe shape looks good to me. |
 |
| Lots of sanding and putty required. Rescribing panel lines is also necessary. |
 | |
| Added the exhaust pipe finished with pigments and washes. |
 |
| Airbrushed some dirt, streaks and fumes with Tamiya´s redbrown and flat black. |
 |
| Exhaust fumes were also airbrushed with thinned acrylics from Tamiya. |
 |
| More weathering done by airbrush. |
 |
| Weathered engine cowling. Exhaust is still missing. |
 |
| Left engine cowling. Some final toughes missing! |
 |
| Left upper wing with airbrushed Balkenkreuz. |
 |
| Weatherd underside. |
 |
| Weathering almost done ... |
 |
| Pale blue undercoat with thin white top coat. |
 |
| White tail plane still needs some weathering! |


 |
| Proof of concept: I sprayed the complete model with a mix of thinners and hairspray adjusted to work with the lacquers used on the model. |
 |
| Dark areas are still wet of rinsing the model under the shower. This gives an idea of the original shades. This is the first time use on a model after a few years of empiric research – and failures! Erhh.. happy little accidents! (Love you, Bob Ross!) |
 |
| The dried model shows the bleached finish to advantage. Now the mechanical part of the physicochemical weathering can begin :-) |
 |
| Working on the wheels. Added mud and dirt made of pigments and fixer. |
 |
| Test of my new weathering technique: Base colors are a mix of browns from Zero Paint RAL 8017 and Tamiya XF-64. In the picture this color is the dark shade. Then a coat of hairspray was applied for 30 sec. Rinse with water. Chemical reaction leads the light shade seen above. This can be mechanically removed with wooden chisels, stiff brushes etc. |
 |
| Dry fitting of subassemblies. All markings are airbrushed. |
 |
| Camouflage was sprayed using card board templates to achieve a ragged color seperation. |
 |
| Started to paint and weather the rim covers. Basecoat is RAL 7003 from ZERO PAINTS. Added Tamiya XF-71 and XF-57 for a thin top coat. Added a wet coat of hair spray for some 30 secs. This will weather the paintjob chemically! Then rinsed the parts with warm water. Let dry. Added a first wash and some streaking. |
 |
| Use wooden sticks, pins etc. to partially remove the now bleached top coat. Add washes and streaking. Dirt and dust will follow once the rubber tires has been painted. |
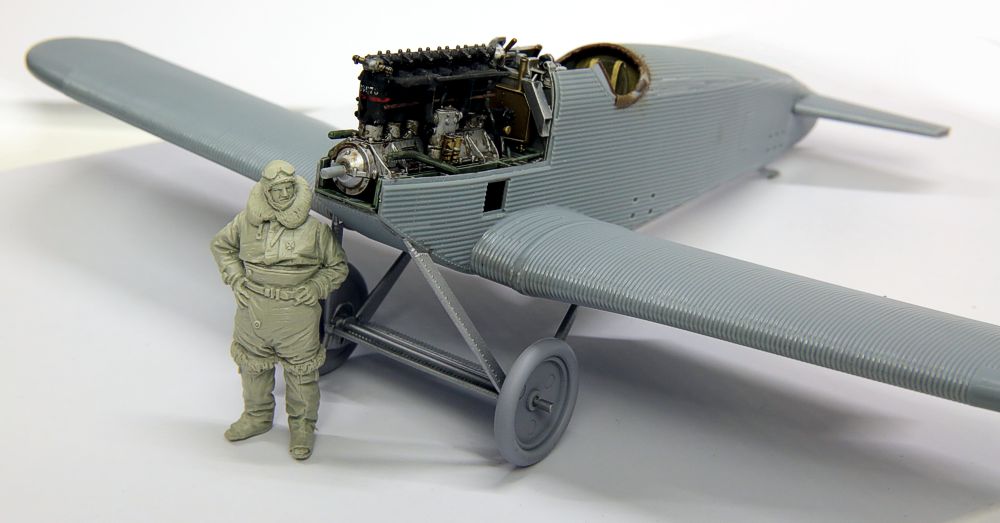 |
| I added the wings and started to work on the landing gear. |
 |
| Resin pilot figure will be part of a small diorama. |
 |
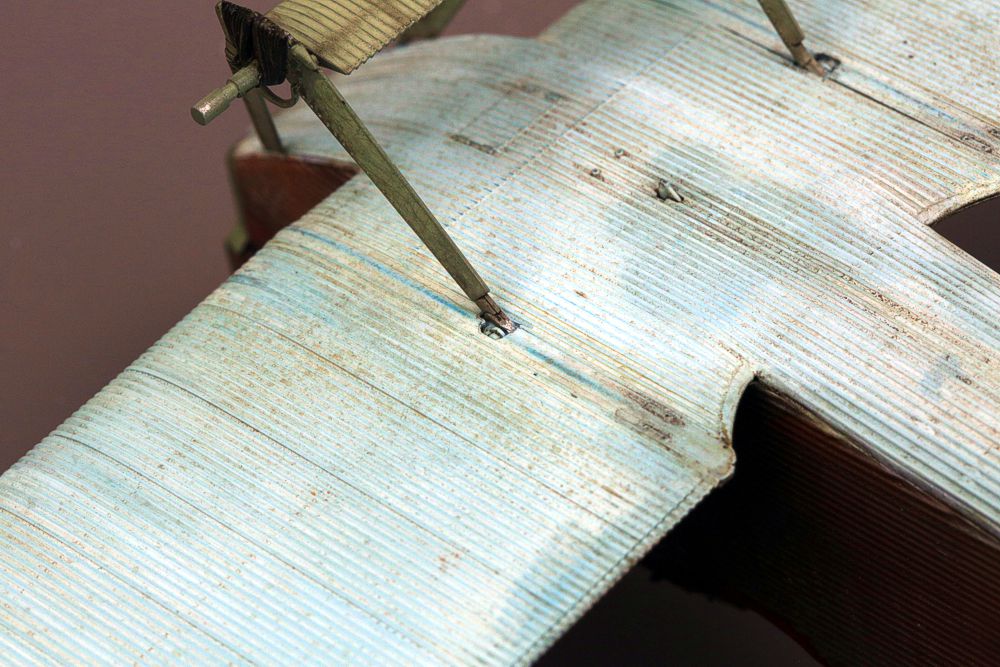
| Wing root detail showing the corrugated dural construction of the Junkers to advantage. Although fit is very good careful clean-up work along the seams is mandatory. |
 |
| WIP: Wooden Axial propeller made from laminated veneer. |
 |
| Cockpit detail is great OOB, it is the original that has a spatan instrumentation! |
 |
| The well known Daimler-Mercedes D.III known from many previous WNW kits. |
 |
| I decided to model a D.IIIaü motor with 200 hp. |
 |
| Most of the engine detail will be covered underneath hoods and panels, however. |
 |
| The Junkers D.1 is a late war production so I tried to show the use of lower quality materials, e.g. inferior seat upholstery. |